

Storm Damage Insurance Claims
What Is an Insurance Claim?
An insurance claim for property damage is a formal request made by a property owner or policyholder to their insurance company for coverage of damage or loss to their property caused by an event that may be covered under their insurance policy.
For a homeowner, this typically means notifying your insurance company that your home or property has suffered damage from a potentially covered event—such as wind, hail, fire, or another loss—and requesting that the insurance company inspect the damage and determine what coverage is available under your policy.
Important: filing a claim does not automatically mean the damage is covered or that the insurance company will pay for repairs. The insurance carrier investigates the loss, determines whether the cause is covered, evaluates the scope of damage, and applies the policy's deductible, limits, exclusions, and other terms.
Book a Storm Damage InspectionBefore You File
When Should You File a Claim?
For property damage, you generally know it may be time to file an insurance claim when there is visible or suspected damage caused by a specific event and the cost to properly repair the damage may be greater than your deductible. For roofing, siding, gutters, and other exterior damage, consider these factors:
A Damaging Event Occurred
A hailstorm, high winds, a falling tree or limb, a fire, or another sudden event.
Evidence of Damage Exists
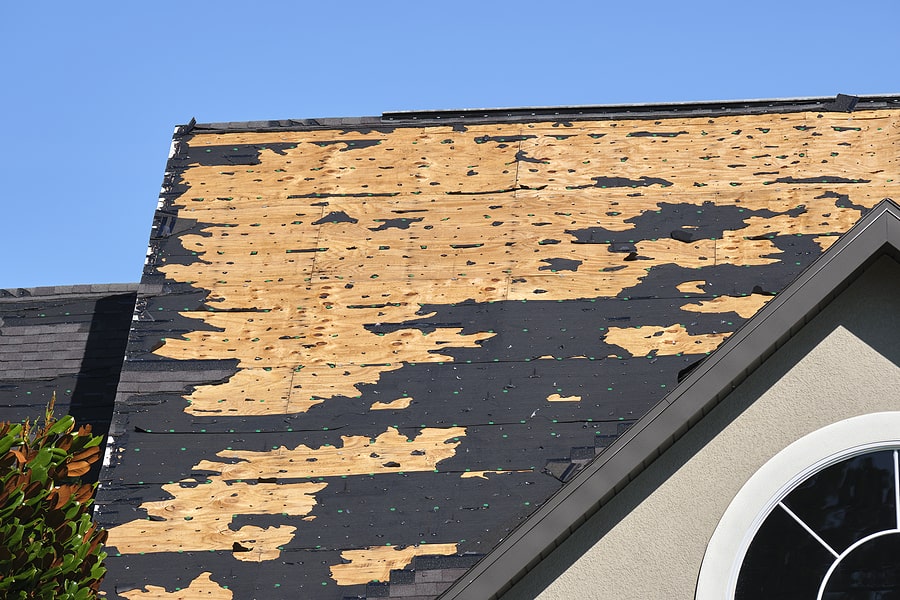
Missing or creased shingles, hail impacts, damaged siding, dented gutters, broken windows, leaks, or other storm-related damage.
The Damage Is Significant
Repairs are likely to cost substantially more than your deductible.
A Qualified Inspection Confirms Damage
A reputable contractor identifies damage consistent with the reported event. The contractor can document the condition, but the insurance company determines whether the loss is covered.
It's a Covered Event, Not Normal Aging
Insurance generally isn't intended to pay for routine maintenance, deterioration, installation defects, or ordinary wear and tear.
You're Within the Reporting Requirements
Policies can have deadlines or other requirements for reporting a loss, so review your policy or contact your insurer if you're unsure.
A Good Rule for Homeowners
Don't file a claim simply because a storm came through. First determine whether there is legitimate property damage. If an inspection identifies meaningful damage that may be covered and the repair cost justifies involving insurance, then it may make sense to contact your insurance company and file a claim.
Step by Step
What Is the Claim Process?
If your roof and siding were damaged by a storm (hail, wind, fallen tree, etc.), the typical insurance claim process looks like this:
Step 1
Document the Damage
- Take photos and videos of all visible damage to the roof, siding, gutters, windows, and any interior leaks.
- Record the date and cause of the damage (storm, hail, wind event, etc.).
- Save any repair estimates, invoices, or emergency mitigation receipts.
Step 2
Prevent Further Damage
- Make temporary repairs if necessary to stop leaks or additional damage.
- Keep all receipts for tarping, emergency repairs, or water mitigation, since insurance may reimburse these costs.
Step 3
Contact Your Insurance Company
- Before submitting a claim, have a reputable local company verify there is enough damage, to avoid making insufficient claims. This minimizes claim denials.
- Call your insurance carrier or submit a claim online.
- Provide your policy number, the date of loss, a description of the damage, and photos if requested.
- You will receive a claim number and be assigned an adjuster.
Step 4
Schedule an Inspection
- The insurance adjuster will inspect the property.
- Many homeowners choose to have a roofing or siding contractor present during the inspection to help identify all storm-related damage.
- The third-party adjuster will take pictures back to the office for the desk adjuster to determine what damage is covered under the policy.
Step 5
Review the Insurance Estimate
- The insurance company will issue a scope of work and estimate.
- Review it carefully with the company you choose to work with, to ensure all damaged roofing, siding, gutters, and related items are included.
- If something is missing, your contractor can often provide documentation and request a supplement.
Step 6
Select a Contractor
- Choose a licensed and insured contractor experienced with insurance restoration work.
- Provide the contractor with the insurance estimate and claim information.
Step 7
Complete Repairs
- The contractor performs the approved repairs or replacement.
- Any additional damage discovered during construction may be submitted to the insurer as a supplement.
Step 8
Final Payment
Most claims involve:- Initial payment (Actual Cash Value, or ACV) issued after claim approval.
- Recoverable depreciation payment released after the work is completed and final documentation is submitted.
- Supplements are additional work that is incurred but reimbursed. This payment comes with the second check, or as a separate third check, depending on the timing of invoicing. Supplement checks are typically due to the contractor unless other arrangements are established beforehand.
Claim Checklist
Be Prepared and Avoid Common Mistakes

Information You'll Typically Need
- Insurance policy number
- Claim number
- Date of loss
- Photos of damage
- Contractor estimate (if available)
- Any emergency repair receipts
Common Mistakes to Avoid
- Waiting too long to report the claim.
- Throwing away damaged materials before inspection.
- Signing contracts with public adjusters before understanding your coverage.
- Accepting an insurance estimate without reviewing it with a contractor to ensure all damage was included.
Reading Your Estimate
Understanding Your Insurance Estimate
When reviewing an insurance estimate for roof and siding damage, there are four key items to understand:
01
ACV vs. RCV
RCV (Replacement Cost Value): what it costs to replace the damaged materials at today's prices. Example: new roof and siding cost = $25,000.ACV (Actual Cash Value): replacement cost minus depreciation. Example: RCV = $25,000, depreciation = $5,000, ACV = $20,000.
Many policies pay the ACV first and hold back the depreciation until work is completed.
02
Recoverable Depreciation
This is money the insurance company withholds until the work is finished. Example:- Replacement cost (RCV): $25,000
- Depreciation: $5,000
- Deductible: $1,000
- First check (ACV minus deductible): $19,000
- Final depreciation check: $5,000
03
Deductible
Your deductible is your responsibility. Example: the total approved claim is $25,000 and the deductible is $1,000. Insurance pays up to $24,000, and you pay the remaining $1,000.Be cautious of contractors offering to “waive” or “cover” deductibles, as this is illegal in many states.
04
The Scope of Loss
The insurance estimate contains a detailed list of approved repairs, often generated in Xactimate:- Prep work
- Removal and installation of all components per manufacturer specs and code
- Clean-up
- Disposal
- Permits
- Scaffolding, jacks, etc.
- Height and pitch charges
- Miscellaneous items

Supplements
What If the Estimate Seems Too Low?
This is very common. A contractor can submit a supplement for:
- Missed damage
- Code upgrades
- Additional materials
- Matching requirements
- Hidden damage discovered during repairs
Insurance companies routinely review supplements and may approve additional funds when properly documented.
From Storm to Closed Claim
Typical Storm Claim Timeline
1
A storm occurs.
2
A local, reputable contractor inspects and validates the damage.
3
Claim filed.
4
Third-party adjuster inspection.
5
Pictures reviewed and decided by a desk adjuster.
6
Insurance estimate issued.
7
Contractor review.
8
Supplements submitted (if needed).
9
Work completed.
10
Final invoice submitted.
11
Depreciation released with supplements.
12
Claim closed.
Inspections · Repairs · Replacements
Not sure whether your storm damage needs a repair or a full replacement?